Whether your taking photographs for your Instagram, blog, or business, beautiful visuals are a must. When I look back on the first photographs I every took for my blog, I massively cringe. Most of them were heavily over exposed and not beautiful at all. But with a little bit of practise and perserverence, I have greatly improved my interiors photography skills!
Having learned from my own mistakes, I thought I would share a few simple tips to help you improve your interiors photography too.
Use a Tripod
Shooting indoors means lower light, which means it might be tempting to increase your ISO to compensate. The downside of this is that images shot at a higher iso are not as sharp.
This is why a tripod is your best friend in interiors photography!
Shooting on a tripod means that you don’t have to worry about shutter speed. To get the best possible shot using a tripod, set your camera on a low shutter speed (to let more light into the camera) and low ISO (to keep the images crisp).
If all sounds a bit confusing, have a read of this blog post on ISO and shutter speeds.
Keep Vertical Lines Straight
When shooting interiors photography, one of the most important things to look for are straight lines. There’s nothing more distracting to the eye, than wonky architectural lines.
Look for vertical lines, for example the corners of a room, or window and door fames, to align your camera with. If you have grids in your camera settings, make use of these to ensure everything is lined up nicely.
Some wonky angles can be corrected in editing, but it’s much easier to get everything right in camera.
Shoot From mid Room Height
There’s no hard and fast rule on what height you should shoot your interiors photography at, however as a general rule of thumb, around chest or mid room height, works best for most photos.
Shooting at this height helps to ensure that the most interesting parts of the room are in shot, without bringing in too much floor or ceiling, which can make a photograph look unbalanced.
Use Natural Light
Natural light always looks better in interiors photography. Using other light sources can create unnatural shadows and colour casts, which will rarely do an interior justice.
Shoot at Multiple Exposures
Shooting at multiple exposures means taking the same photograph at different exposure levels. Many cameras have a feature built into their settings, called AEB or automatic exposure bracketing, which will allow you to take photos at multiple exposure settings. Aim to take 3-4 different exposures.
You might find that one of the exposure settings produces the perfect shot, but if not, you can either automatically blend these together in edit. Or use a large soft brush, in photoshop, to blend the images together.
Shoot in RAW
Another way to make sure you have maximum control over the exposure levels in your interiors photography, is to shoot in RAW.
RAW files contain much more data, that would be lost in compressed JPEG files. This data provides more scope to fix exposure issues in edit and also gives more control over editing things like white balance and colour.
Clear Clutter Away
So, now we’ve talked about your camera set up, let’s move onto setting up your interior for the shot.
To get the best shot, make sure you clear away any unnecessary or distracting clutter. Tidy cables, clean away any dust bunnies and make sure surfaces are clean and free from dirt.
You can remove distracting cables, plugs, or marks on the walls, in edit, but much better to get things as perfect as possible before shooting.
Composition
When setting up your camera to shoot, it’s important to think about how you will compose the shot.
Will you use leading lines, to draw the viewers eye? Have you thought about the rule of thirds as a way of creating a perfectly balanced image? How is your use of colour enhancing the overall composition?
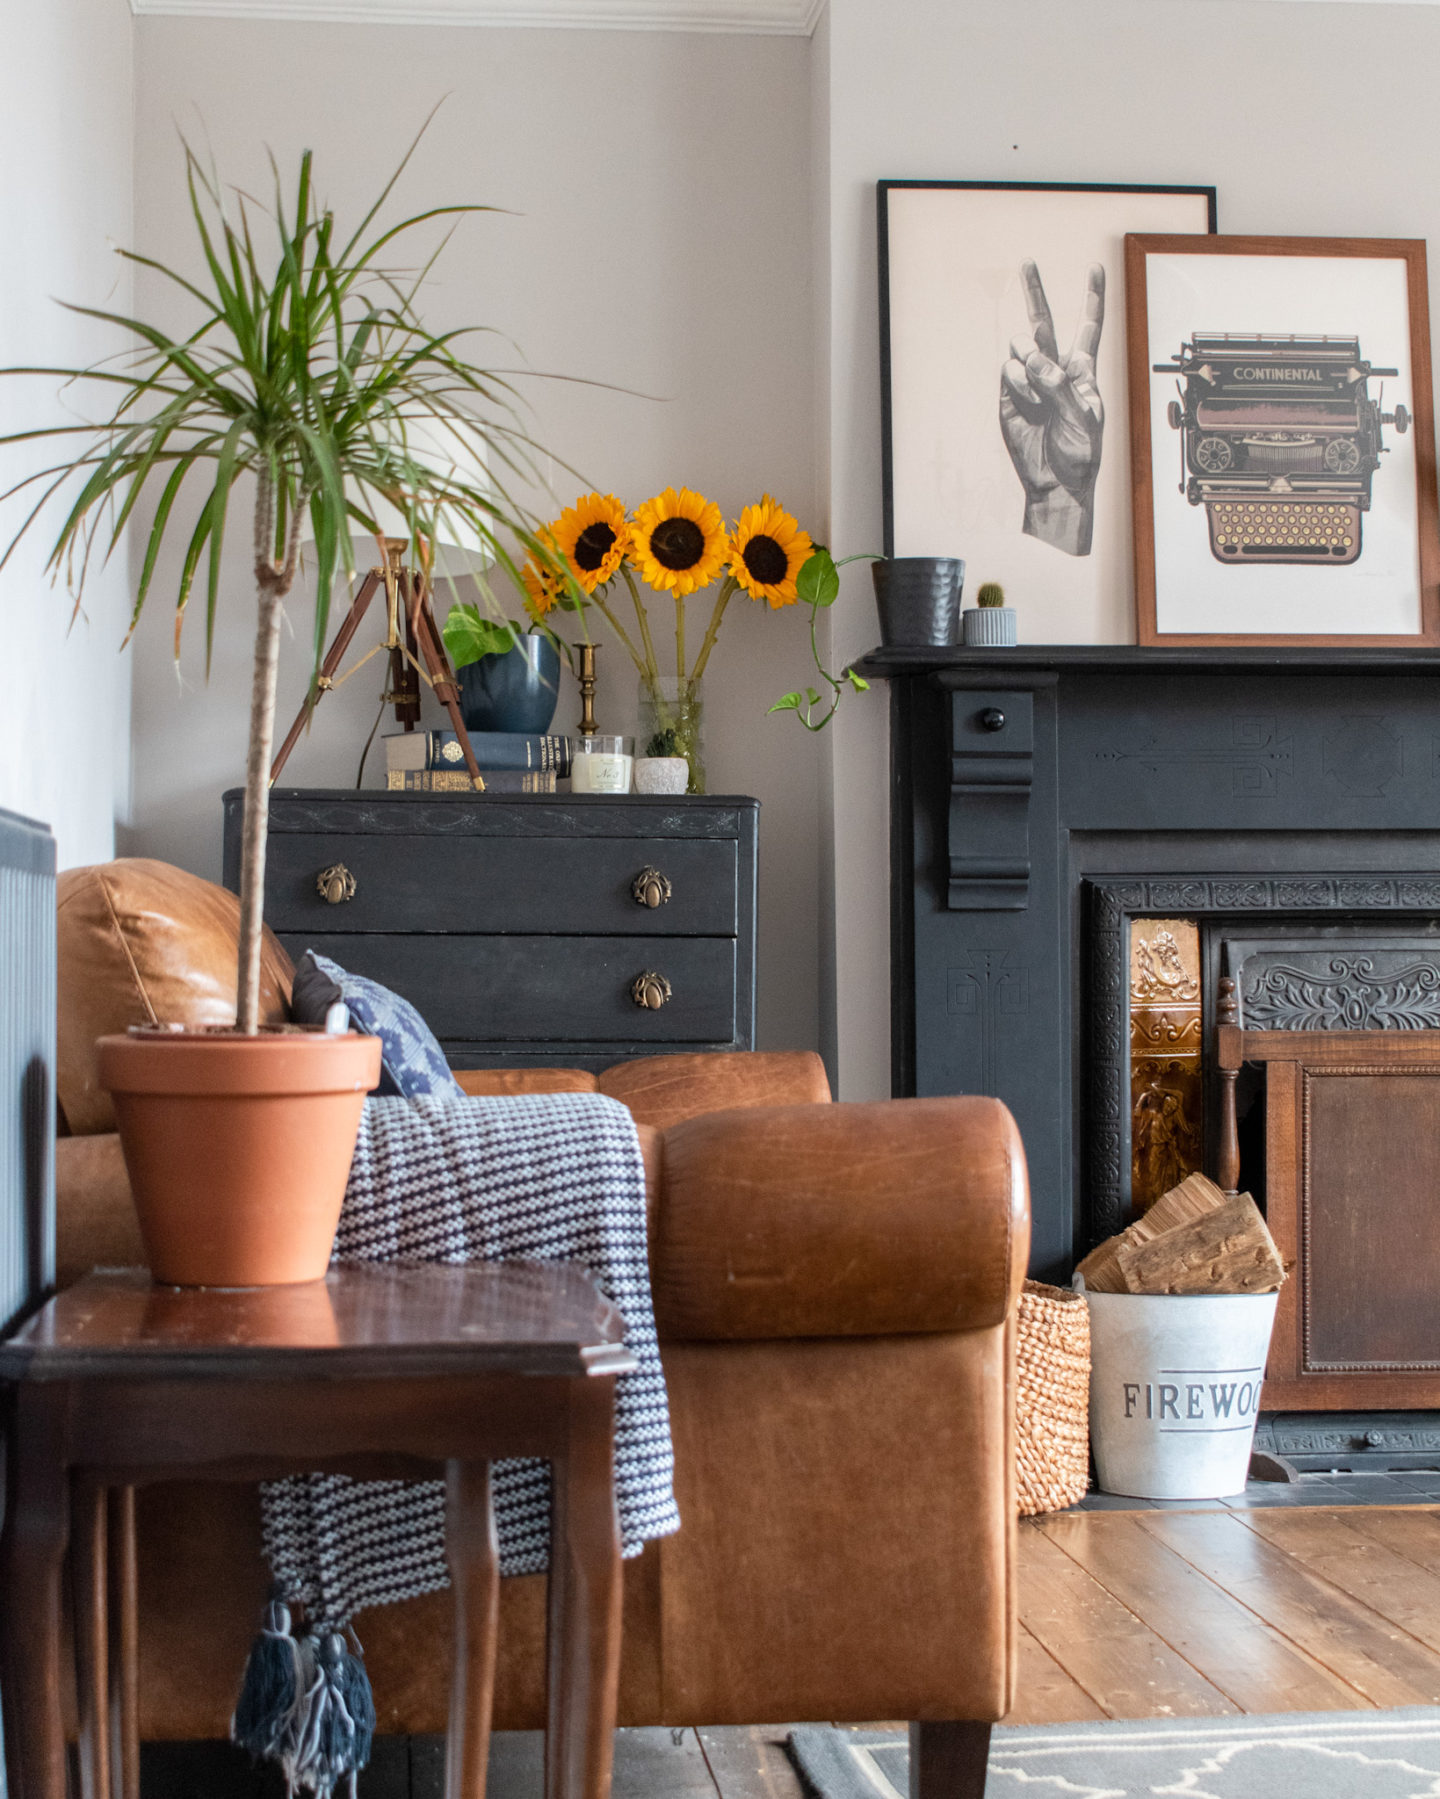
Use Vignettes to Tell a Story
Vignettes are a cluster of objects, brought together to create a visually appealing scene. They are used widely in interior design and are a helpful way of creating atmosphere and interest in a room.
These little vignettes also throw up brilliant interiors photo opportunities. Look for, or create, these little scenes in a room, to help tell a story about the house and the people who live there.
Create Depth
When planning your interiors shots, think about where you want the viewers eye to travel.
You can make a room more attention grabbing by setting up objects in frame that make the viewers eye travel from the foreground, to the middle, or background of an image. An example of how to achieve this, might be to shoot along the side of a table edge, that leads the eye from the front and further into a room.
Think About Aperture
While we’re on the subject of depth, lets talk about aperture. The aperture you use will determine whether you have a blurred or crisp background in your photographs.
For a blurry background, you will need to use a lower aperture and to keep everything in focus, you will want to use a higher number. Here’s a helpful guide to using aperture, that you might find useful.
Be Careful Using Wide Angle Lenses
When shooting interiors, it can be tempting to use the widest lens possible, to capture more of a space. However, wide angle lenses can bring in unwanted distortion, which makes all your lovely straight lines appear curved.
This is why you should always use caution when using your widest settings. Consider whether you might get a better result from using a narrower lens on a different angle instead.
I hope you find these tips useful! If you have any questions or would like to show me any of your photos, you can always drop me an email or tag me on instagram! I’d love to see what you’ve been working on.
If you’d like to read more photography tips, I’ve also written a post on how to take beautiful portraits of children.
