Post contains affiliate links.
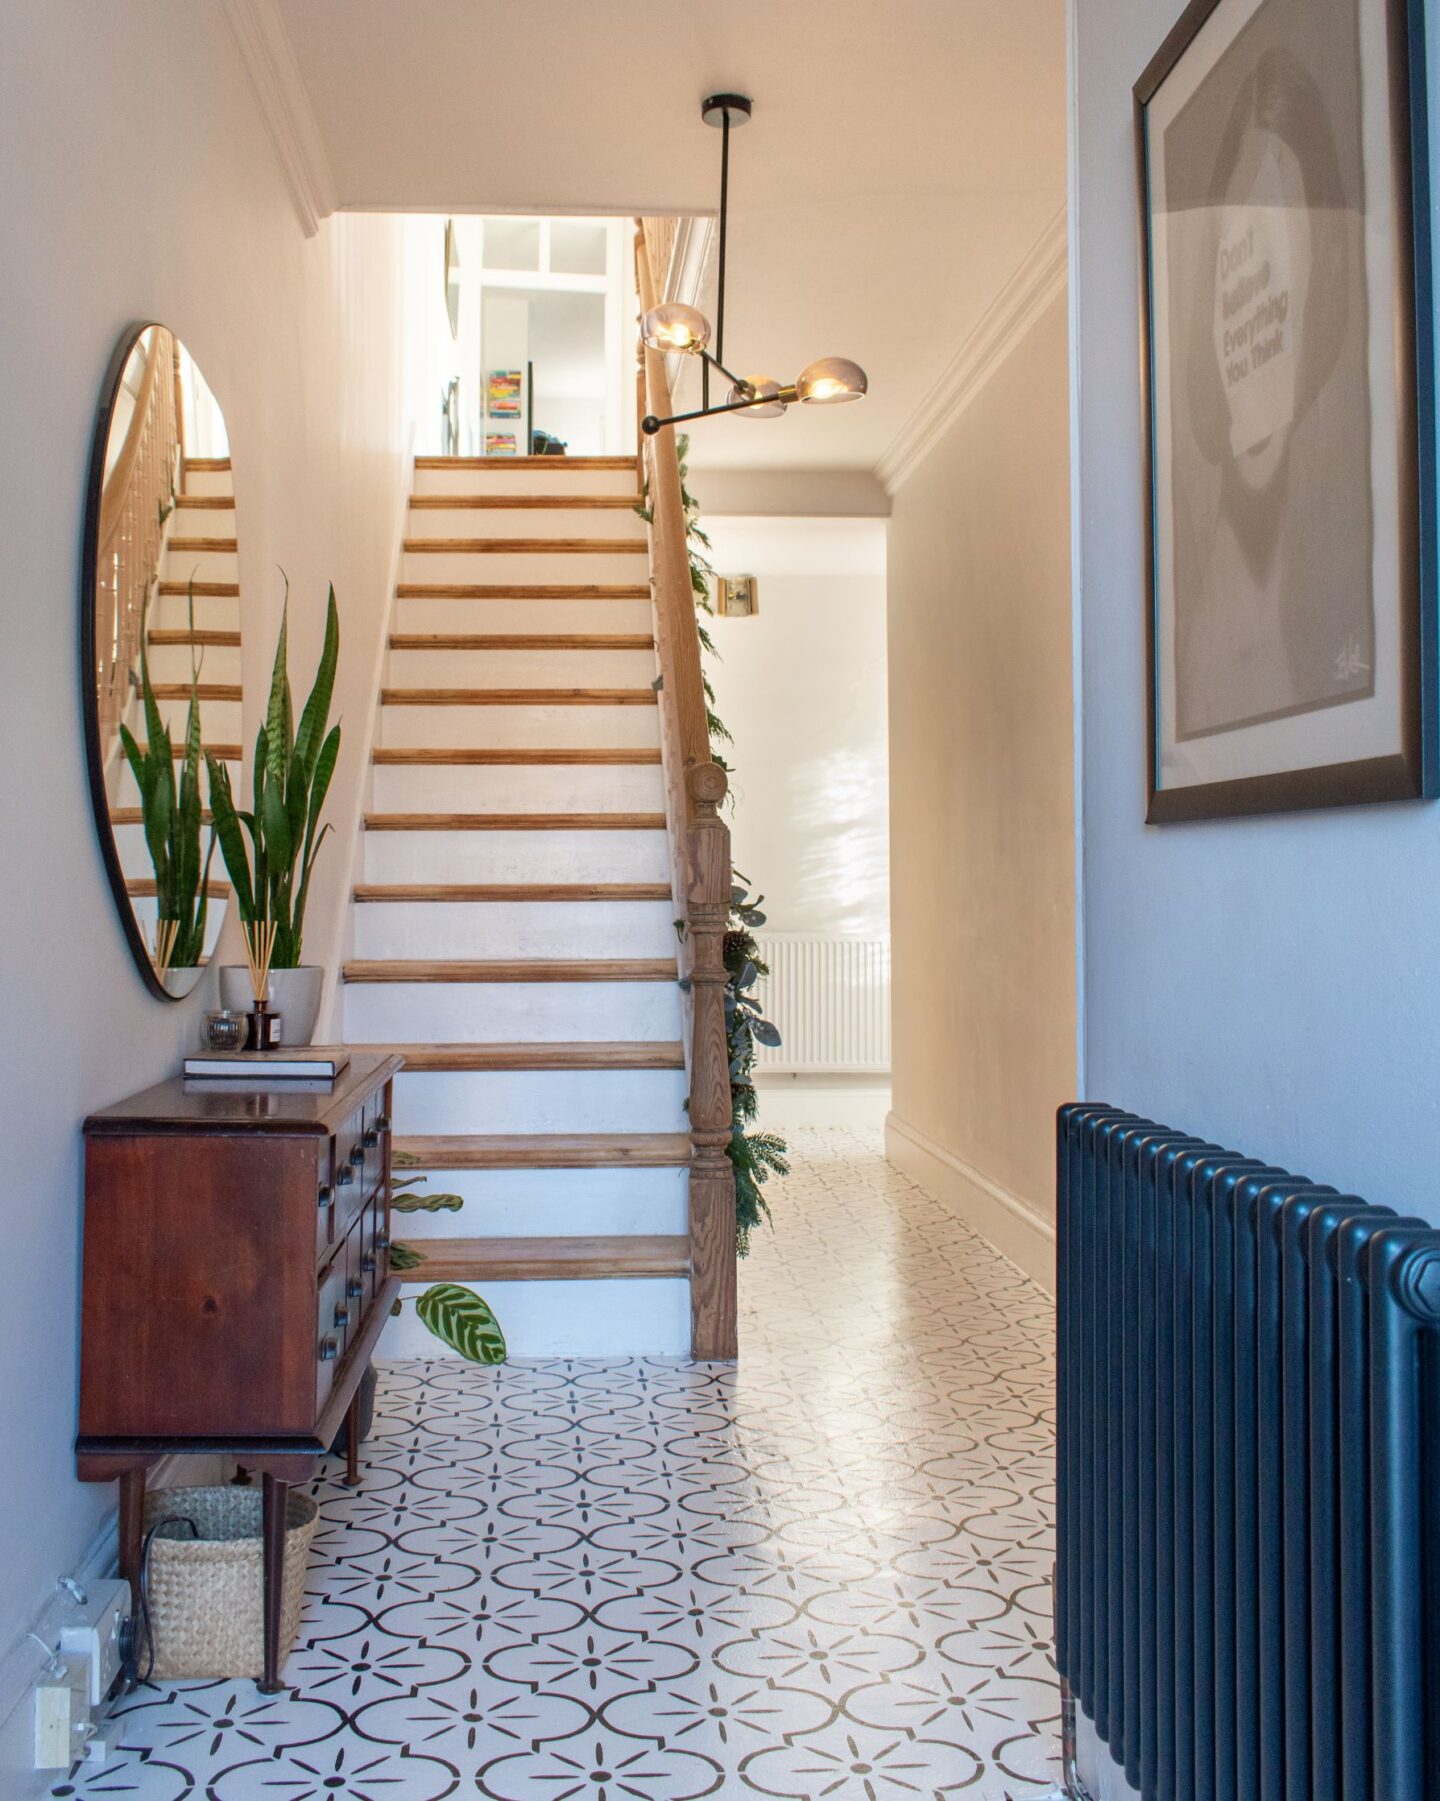
I recently stencilled my hallway floor and a few people asked how I did it, so I thought I’d get it all down in a blog post. I’ll start by saying floor stencilling is incredibly simple and makes a big impact, but it is painstaking and time consuming to do.
I used:
Surface wipes
Floor Stencilling Method:
My hallway floor is a mixture of concrete and quarry tiles. Concrete at the front and quarry tiles to the back, behind the staircase. To prepare the floor for stencilling , I roughly it, using my trusty mouse sander and a fine-ish grit. I took my time going over the quarry tiles. From experience, I know this is the trickiest spot to get the paint to stick.

Once I sanded and cleaned the floors, I painted on 2 coats of Valspar Trade undercoat and primer. You might get away with just once coat, but I found one didn’t give great coverage. So, I went in with a second to be on the safe side.
As I worked with Ronseal on an Instagram campaign for this project, I used Ronseal Diamond Hard White Floor paint as the base colour. At first, I wasn’t sure I liked the consistency of the paint, but I have to say, it went on really well. It also feels easier to clean than say a normal satin paint. It took three coats to get good coverage, but it did say I would need to do three on the tin, so that wasn’t a surprise.

Now, onto the exciting bit. I bought 2 of these stencils in size 30 x 30cm. Three would have made the job a bit quicker, but as this is only a temporary solution, I wanted to do it as cheaply as possible. You could even try doing it with just one stencil, but I have a feeling that would be pretty tedious. I also used Frog tape to hold the stencil in place.
I used Ronseal Diamond Hard Black Floor paint to paint the pattern with a roller over the concrete, then with a round brush over the tiles. The round brush worked best, particularly on uneven surfaces. I used a piece of card to blot the paint, before painting it onto the floor, and didn’t move the stencil between coats. Allow a little time between each coat to build up the colour.
I roughly wiped the stencil down with a surface wipe in-between uses. It was quite annoying and laborious, but it stopped the paint from spreading where I didn’t want it to.
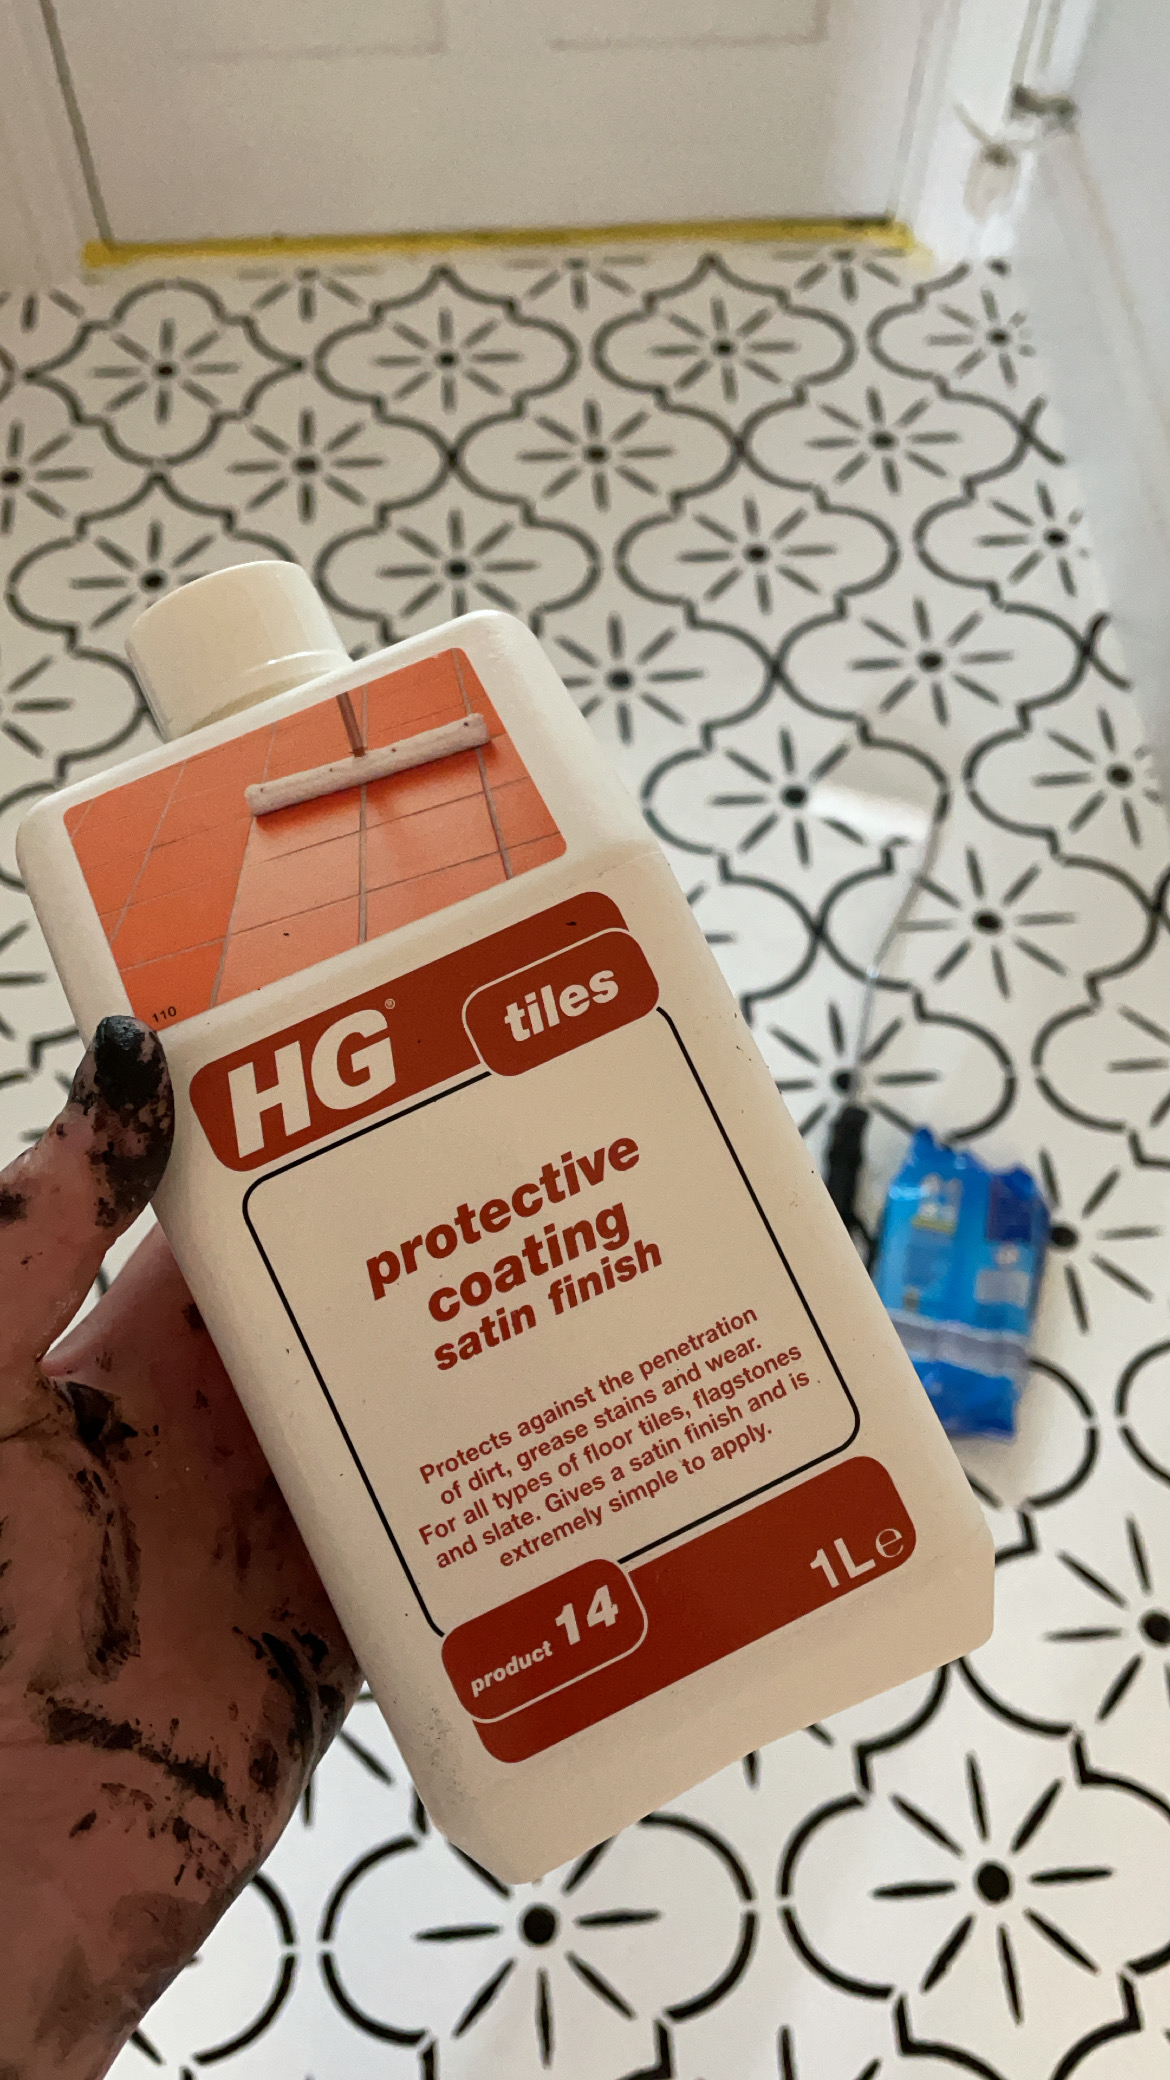
Once the stencilling was done and the paint had fully dried, I wiped it down with a cloth and this sealant product. I highly recommend it. It has given the floor a tougher surface. Although it’s made it slightly slippery, it’s much easier to clean and I feel it’s given it a stronger finish.
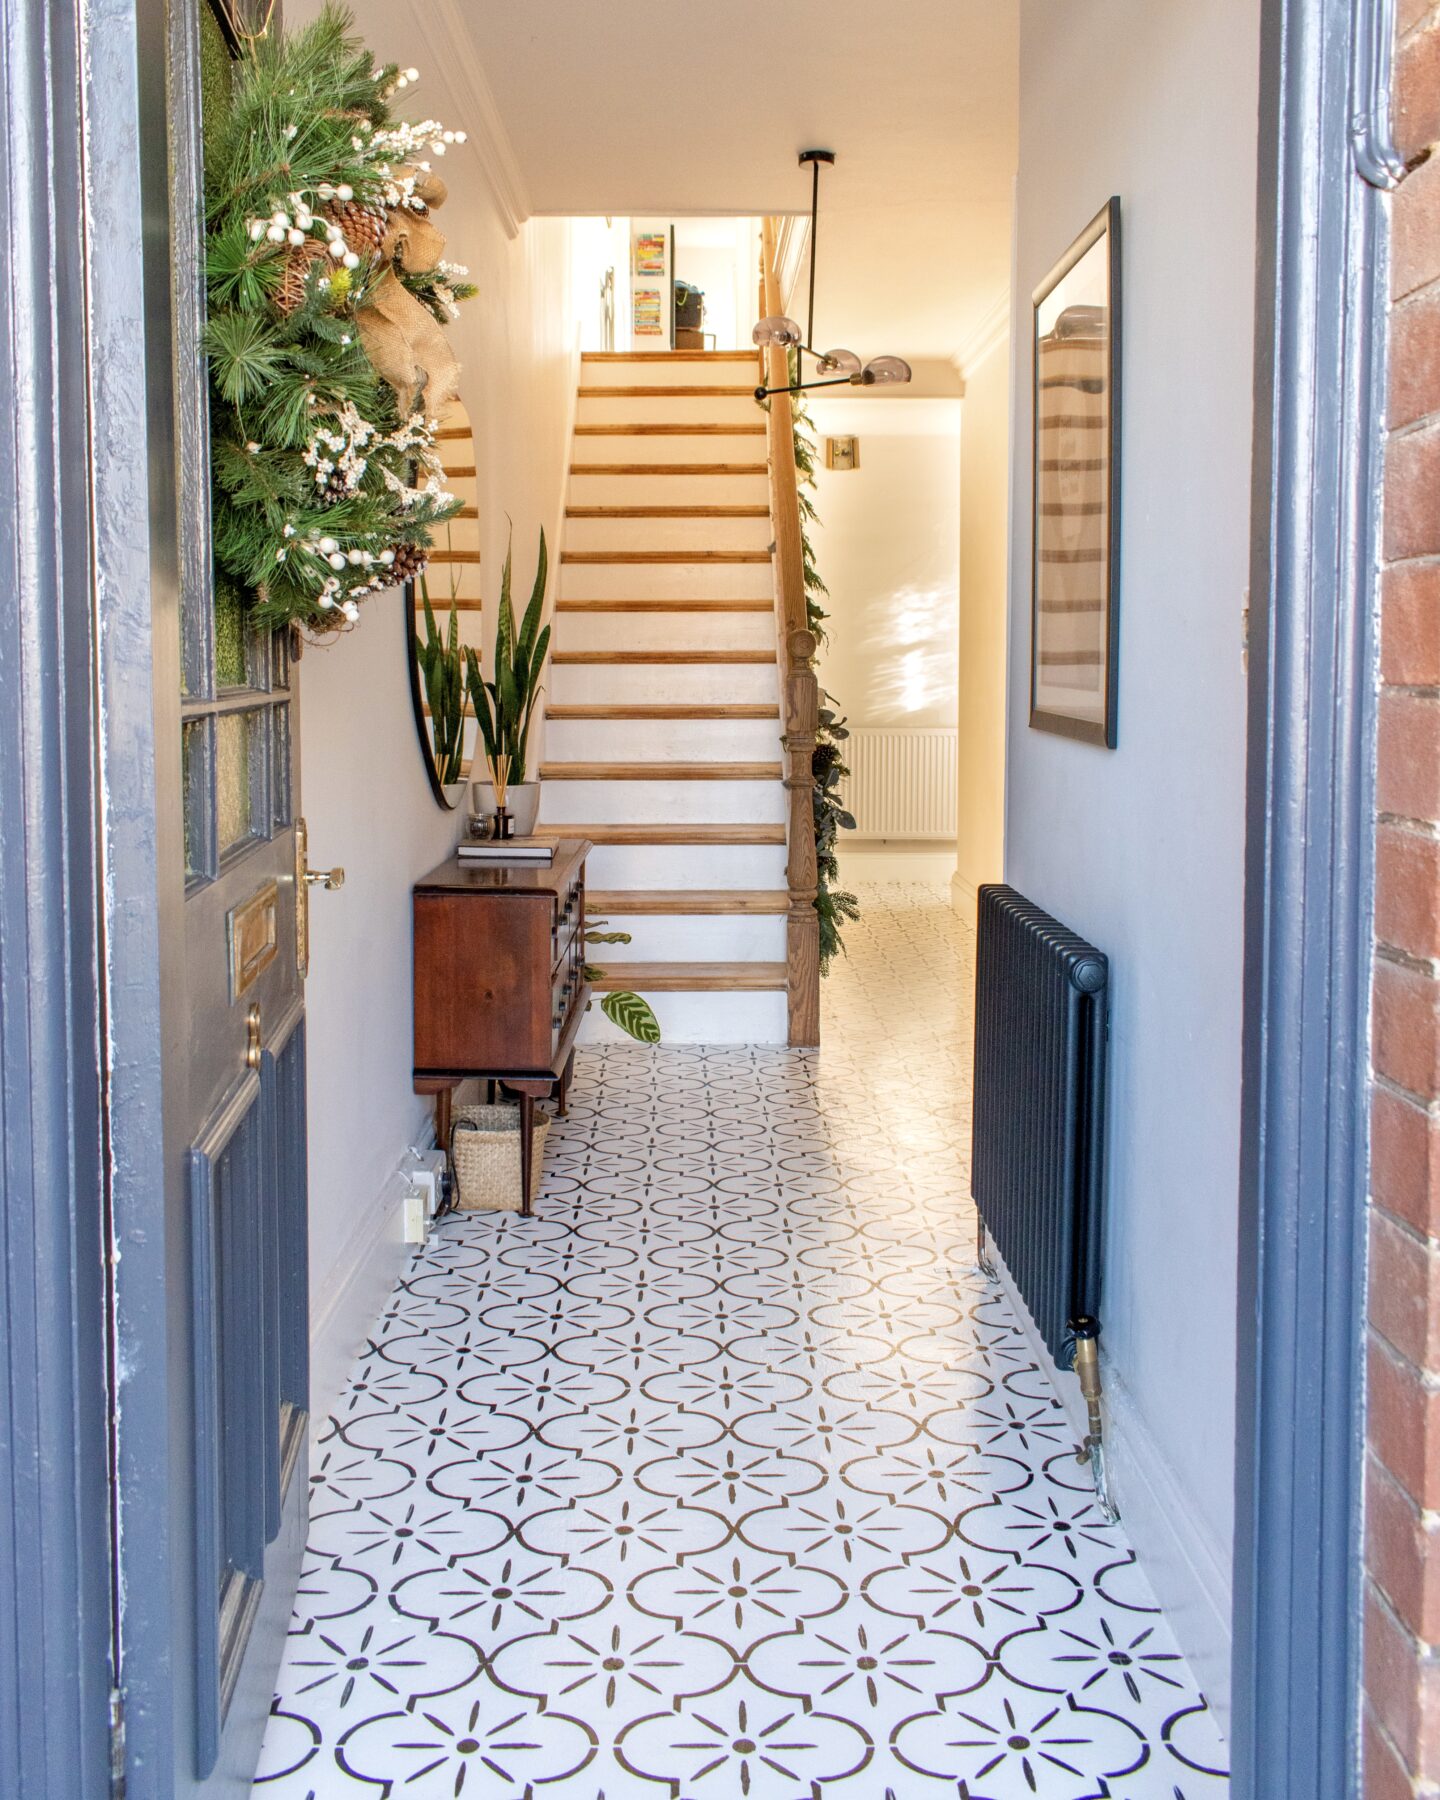
I’m so pleased with the finished results. It looks so much better than I thought it would and it’s made me want to attempt more floor stencilling. It’s made such a difference to the feel of the hallway! I only wish I did it sooner!
If you enjoyed this post, you might like to read my how to on half painted walls.
